CaptionHub’s built-in renderer offers the fastest and easiest way to create burnt-in subtitles, otherwise known as open captions. Just select the language you need in the Download tab, and click on the “Render” button. Once it’s done, click on the “Download render” button.
That said, sometimes you need more control over look and feel; for instance, you might need to use a particular corporate font to format your subtitles with.
It makes a lot of sense to create burnt-in subtitles as part of the last stage of the edit workflow, where all of the other elements that constitute the video are being assembled. Many of our clients use Adobe’s Premiere as their editing tool of choice, and this post explains how to import subtitles directly into Premiere, where you’ll have plenty of control over look and feel.
Adobe Premiere is a powerful editor, but it’s fair to say that Adobe’s support for captioning and subtitling workflows has been historically patchy. Even now, with Adobe Premiere Pro CC 2018, if you import an SRT, you’ll find that the very last caption gets ignored. If that SRT is in Cyrillic, say, then it’ll be imported as garbled characters.
Fortunately, we have a good workaround. Here’s what you’ll need to do to get captions into Premiere:
1. From CaptionHub, download captions as the broadcast standard EBU-STL. (Sorry: this is only available to Pro and Enterprise customers). Ensure that your character limit is set to a maximum of 38 characters per line – the EBU-STL specification doesn’t accept any more than that.
2. Open (or create) your project in Adobe Premiere
3. Choose File > Import, and choose the EBU-STL file you’ve just downloaded from CaptionHub
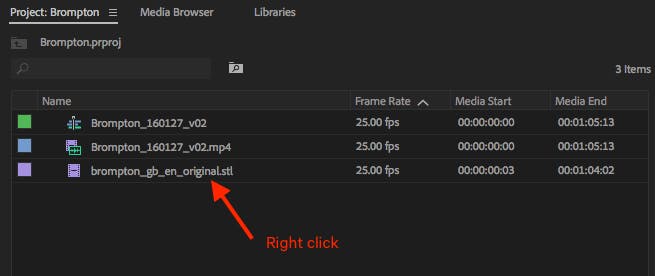
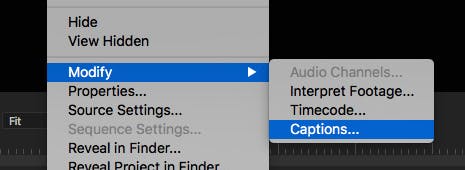
4. In the Project window in Adobe Premiere, right-click on the imported captions and choose Modify > Captions
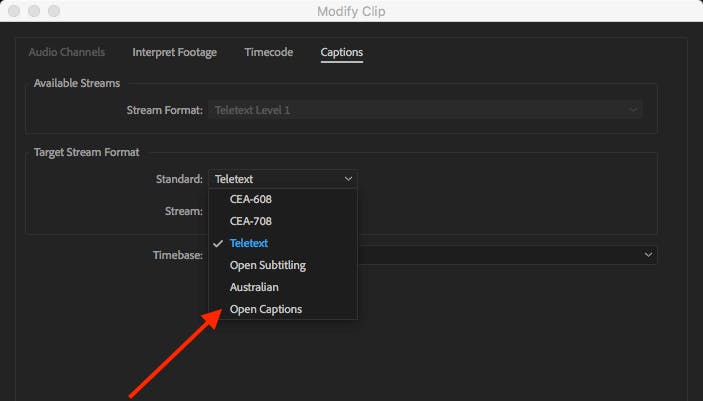
5. In the Modify Clip dialogue box, change the Target Stream format from Teletext to Open Captions
That’s it: now you have captions you can edit and style in Adobe Premiere!
To view them, just drag and drop the captions from the Project window onto a new layer on the Timeline. To edit them, click on the layer in the Timeline, and edit away.
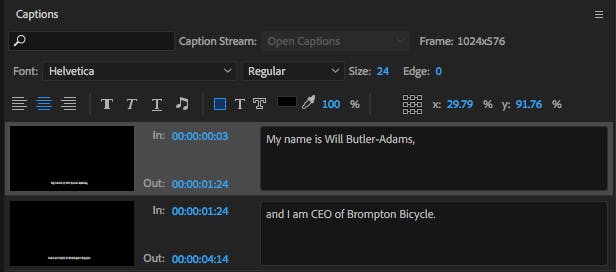
A good hint if you want to edit everything at once is to select the first subtitle, then Shift-click on the last. This way, any formatting changes will apply to all the subtitles at once.
For those looking to demo the subtitling feature on CaptionHub, simply fill in your details here and get started today.
Happy subtitling!